The Setting
By 1916, both sides were locked in a stalemate. The Allies planned a major offensive to break the deadlock. However, before they launched their offensive, the Germans attacked Verdun, causing the French to reduce their efforts elsewhere. As a consequence, the British revised their plan, deciding to concentrate their forces along a forty kilometre portion of the front in the Somme valley.
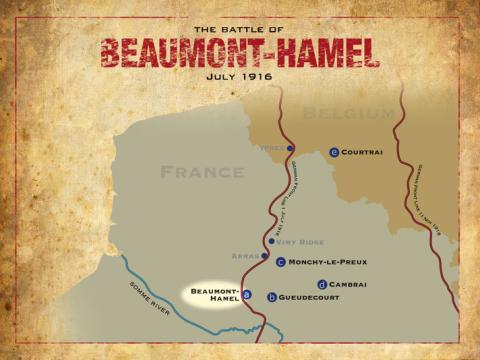
The advance at Beaumont-Hamel on July 1, 1916 was part of the opening day of the Battle of the Somme. Initially, the Allied powers had hoped for a quick and decisive victory in the attack. However, the Battle of the Somme dragged on until November 18.*
* The Battle of the Somme consisted of twelve separate battles fought between July 1 and November 18, 1916. The Battle of Albert refers to the first two weeks of fighting on the Somme.
The Plan
In order to weaken German defences for the attack, the British artillery began bombarding the enemy line on June 24. During the next seven days, 1 732 873 shells were fired at the German position.
The intent of the shelling was to destroy the Germans' defences, including the lines of barbed wire protecting their trenches. While the bombardment affected the Germans' morale and prevented fresh supplies from reaching them, it did not cause as much damage as anticipated. The Germans were well protected in deep dugouts. Many of the shells fired were duds, and the ones that did explode frequently missed their targets. The bombardment had little or no effect on enemy barbed wire.
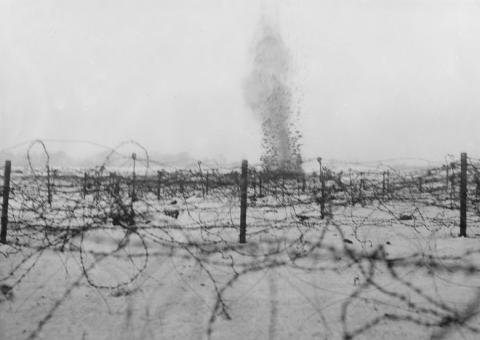
Shell Exploding Behind Barbed Wire, Beaumont-Hamel, France, July 1916
The Rooms Provincial Archives B2-41
The 29th Division's assignment on the first day of the battle was to take over the enemy's trenches near the village of Beaumont-Hamel. The 86th and 87th Brigades were to capture the enemy's first and intermediate trenches. The Newfoundland Regiment would then advance with the rest of the 88th Brigade to capture a third-position support trench known as the Puisieux Trench.
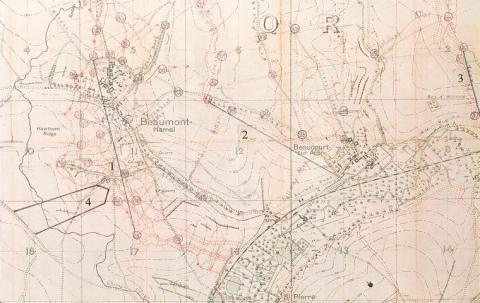
Battle Plan
|1| First Objective |2| Second Objective |3| Third Objective |4| Limit of Newfoundland Regiment Advance
The Action
At 0700 on July 1, 1916 the Allies' shelling intensified. The bombardment was reportedly heard in north London, nearly 322 kilometres away. At 0720, the shelling ended as the Allies detonated 18 500 kilograms of explosives under an enemy strongpoint at nearby Hawthorne Ridge. British troops were given ten minutes to reach and occupy the crater caused by this explosion. As they moved, so did the Germans, who readied their defences and machine guns.
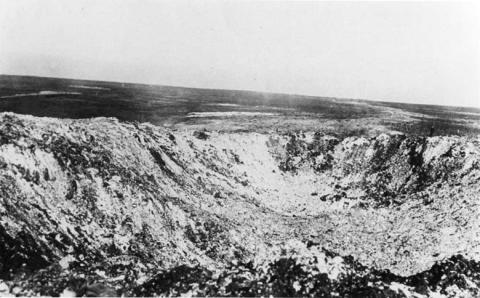
Crater caused by mine detonating at Hawthorne Ridge
The Rooms Provincial Archives B2-45
Zero hour was 0730. At Beaumont-Hamel, battalions of the 86th and 87th Brigades ran up the trench steps and onto the battlefront. As ordered, the Newfoundland Regiment remained in the trenches. Ahead of them, the 2nd Battalion of the South Wales Borderers began its attack. As soon as the men moved out, many were shot down. Wounded men began falling back over the parapet and soon filled the trenches.
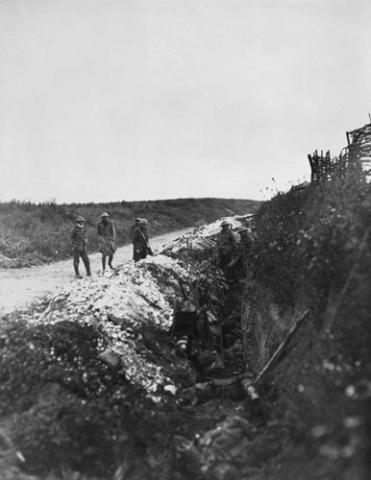
Newfoundland soldiers in St. John’s Road support trench, early morning, 1 July 1916
The Rooms Provincial Archives NA 3105
By 0800, there was confusion along the Allied lines. The first two attack waves had not been successful. British generals, however, were receiving conflicting reports from the battlefield.
Half an hour later, there was a lull on the battlefield. Although the 86th and 87th Brigades had not achieved their objectives, the Newfoundland Regiment received orders at 0845 to advance.
At the time, the Regiment was still in the support trenches behind the planned jump-off point. Moving through the trenches crammed with wounded men had become difficult. It was decided the Newfoundland Regiment should proceed over land instead of through the trench system. This meant the men would have to cross an additional 250 metres of their own ground to get to "No Man's Land".
The original plan had been for the Essex Regiment to advance along the right side of the Newfoundland Regiment. However, the Commander of the Essex Regiment decided to minimize his troops' exposure to enemy fire and continue moving through the trenches. Thus, when the men of the Newfoundland Regiment moved, they were alone on the battlefield.
"A" and "B" Companies of the Newfoundland Regiment moved first. Almost immediately, men began to fall as they were hit by machine gun fire. Many men fell before reaching the British front line trench. Those who did make it that far then had to pass through pre-cut gaps in the British wire. The German machine gunners had these gaps targeted. It was later reported that during this interval the intense firing caused some of the German machine guns to overheat.
Behind these men, the soldiers of "C" and "D" Companies were beginning the same journey. Major A. Raley later commented that: "The only visible sign that the men knew they were under this terrific fire was that they all instinctively tucked their chins into an advanced shoulder as they had so often done when fighting their way home against a blizzard in some little outport in far off Newfoundland."
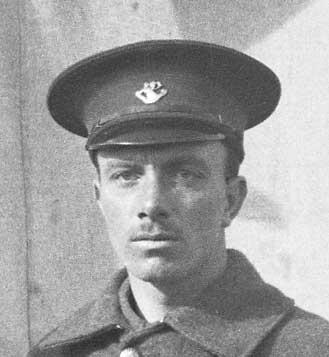
Major A. Raley
The Rooms Provincial Archives F30-26
The Newfoundland Regiment's official War Diary reported:
"The enemy's fire was effective from the outset, but the heaviest casualties occurred on passing through the gaps in our front wire where the men were mown down in heaps. Many more gaps in the wire were required than had been cut. In spite of losses, the survivors steadily advanced until close to the enemy's wire, by which time very few remained. A few men are believed to have actually succeeded in throwing bombs into the enemy's trench."
At 0945, the Newfoundland Regiment's Commanding Officer reported to headquarters that the attack had failed.
The Outcome
Final battle figures revealed 233 men from the Regiment dead, 386 wounded, and ninety-one reported missing (and later assumed dead). Only 110 men from the Regiment remained unscathed after the battle. The casualty rate for many battalions was over fifty percent; for the Newfoundland Regiment, it was eighty-five percent. Only one other battalion, the 10th West Yorks, had a higher casualty rate.

Beaumont-Hamel Fatalities
While Newfoundland and Labrador grieved for its lost men, other regions from across the United Kingdom were similarly affected. In just hours, 19 240 soldiers in the British Army, including those of the Newfoundland Regiment, were dead. There were also 35 494 seriously wounded and 2152 soldiers reported missing. Like the Newfoundland Regiment, many British battalions were made up of men from the same region.
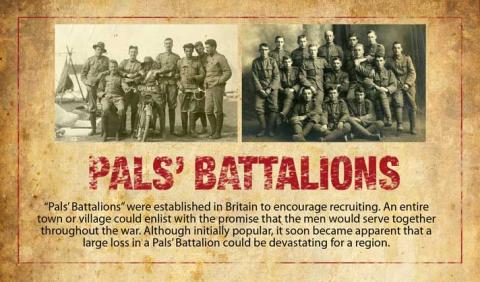
The Rooms Provincial Archives A 8-90 (Left), B 5-157 (Right)
The Regiment's sacrifice at Beaumont-Hamel was noted by Allied leaders. Commander-in-Chief of the British Forces, Sir Douglas Haig, wrote: "Newfoundland may well feel proud of her sons. The heroism and devotion to duty they displayed on 1st July has never been surpassed."
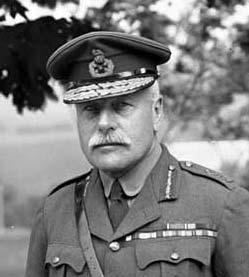
Sir Douglas Haig
The Rooms Provincial Archives E-2-16
Despite the devastating losses at Beaumont-Hamel, recruiting efforts for the Newfoundland Regiment continued successfully back home and the Regiment soon rebuilt itself. "The losses in the field have stimulated recruiting," Newfoundland's Governor reported to Field Marshall Haig. However, by the beginning of 1918, the recruiting situation would be more difficult.